
Good-Bye to Season 2019 – Reflections from Farmer Kurt
Week 18 | October 20-26, 2019 | “B” Week
This is our Final week of our CSA. We say good-bye!
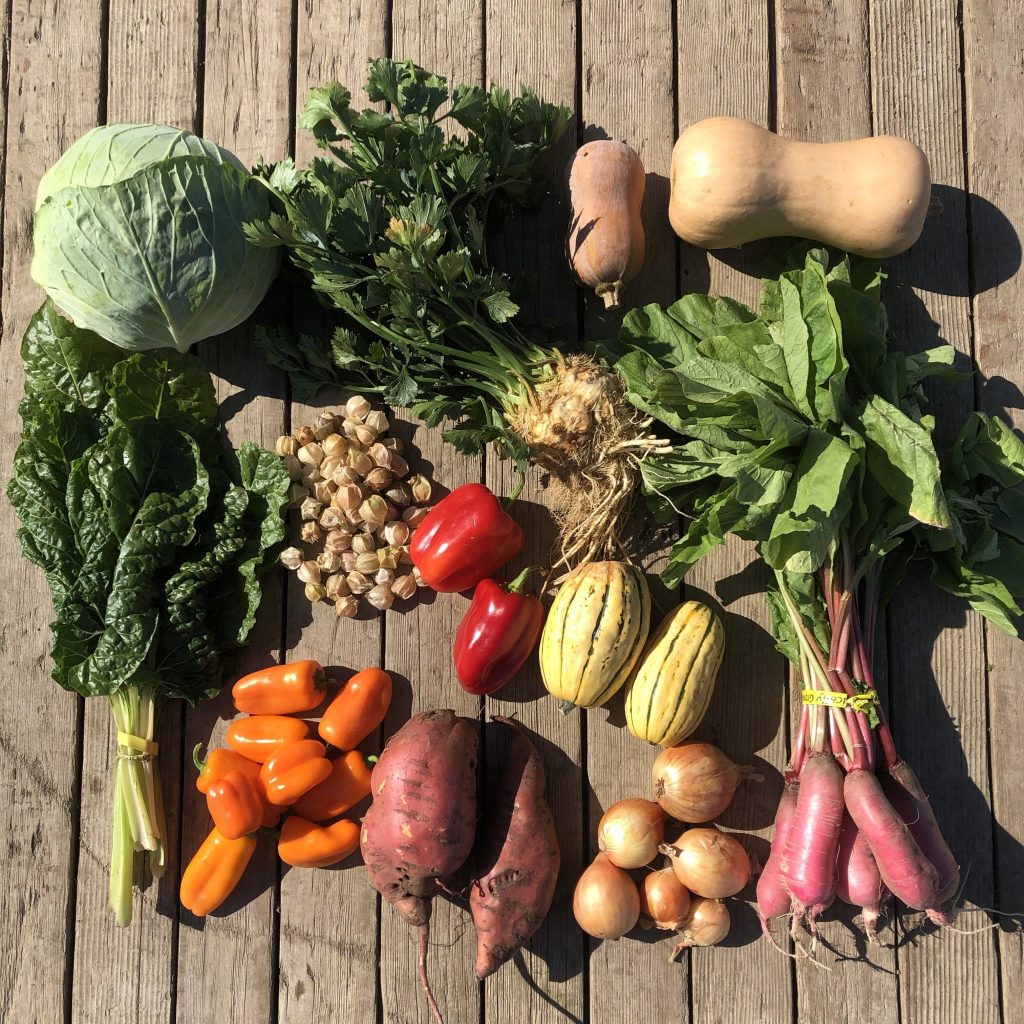
IN YOUR VEGGIE BOX THIS WEEK:
SWEET POTATOES ~ These will not be cured. Store them on our counter — the longer you let them sit, the sweeter they will get. Use within a couple weeks.
MINI SWEET SNACK SIZE PEPPERS – ORANGE (2 pints) ~ Store this in the fridge in a plastic bag. Peppers can also be flash frozen. Just throw them in a Ziploc bag (whole or chopped) and freeze! These are great snacking peppers for kid lunches.
DELICATA SQUASH ~ This is a winter squash. Store it on your counter or in a cool dark place. The longer you store it, the sweeter it gets. You can eat the skin on this one! Or roast it or bake it. Remove seeds. Eat the pulp.
BUTTERNUT SQUASH ~ This is a winter squash. Store it on your counter or in a cool dark place. The longer you store it, the sweeter it gets. Roast it or bake it. Remove seeds. Eat the pulp. Roast the seeds too!
HONEYNUT SQUASH ~ This winter squash looks like a mini butternut, and I think it’s the sweetest of all the squashes. Store it on your counter or in a cool dark place. The longer you store it, the sweeter it gets. Roast it or bake it. Remove seeds. Eat the pulp. Roast the seeds too!
SHUNKYO SEMI-LONG RADISHES ~ Take the tops off when you get home (or the root will get soft). Store the greens in a green bag. Use them in scrambled eggs or sauces. Store the roots in a bag in the fridge separately.
MIXED RED & YELLOW ONIONS (1 QT) ~ store these on your counter or in a cool, dark place – preferably not next to the potatoes.
CABBAGE ~ store in the fridge for up to 2 months.
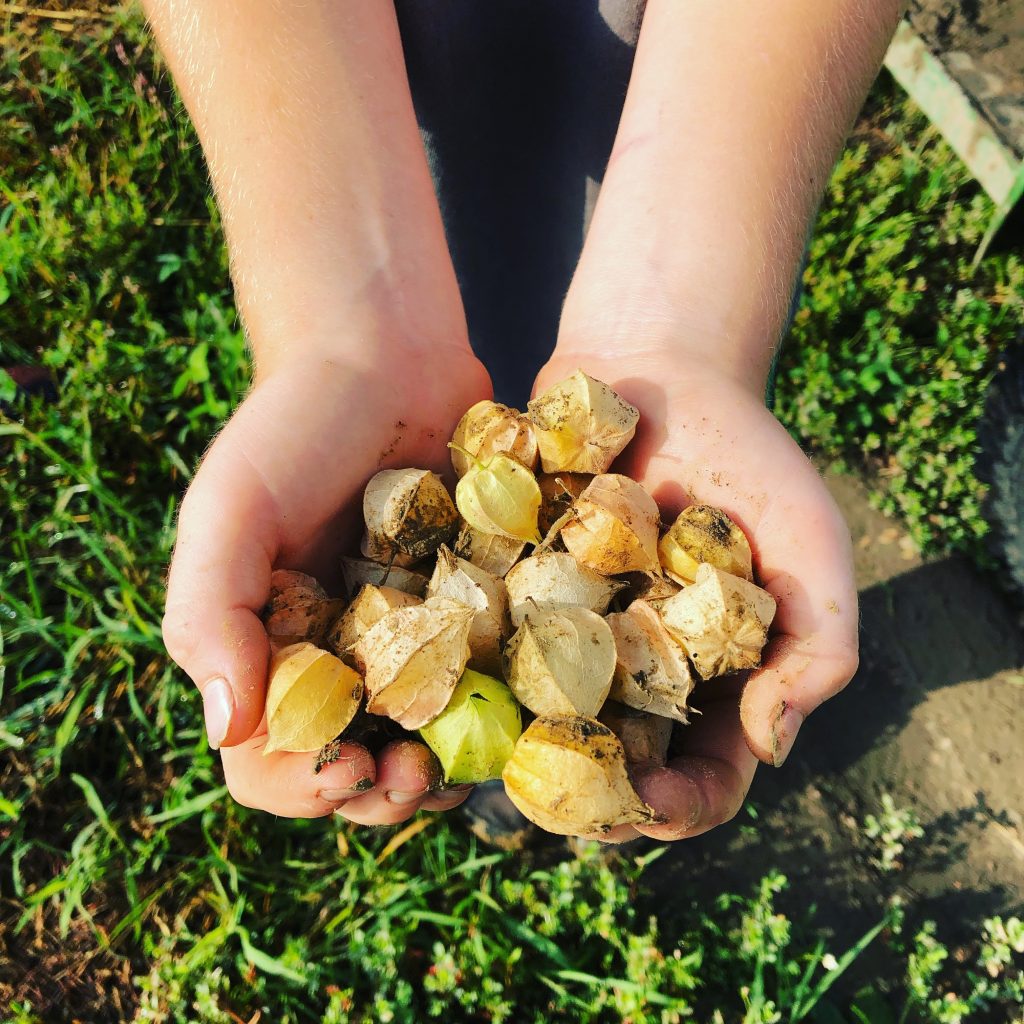
These are ground cherries!
GROUND CHERRIES (extra) ~ store on your counter. Remove the husk before eating. Pop them raw as a snack or throw into a salad. They’re also good in desserts.
BROCCOLI (extra) ~ store in the fridge in a Green bag. Chop off the very bottom half-inch of the stem before eating. Cook the stems a bit longer than the tops.
SWISS CHARD (extra)~ Store this green in a Debbie Meyer green bag in your fridge and use within a week. Wilt these down in sauces or soups. The stems are also great chopped up in a soup.
MADDIE & BELLA COFFEE: “Harvest Blend” – check out the cover design, from a local artist
 FARMER KURT’S FINAL GOOD-BYE
How’s everyone doing?!!! It’s our final week of CSA!!
Are you feeling sad?
Yeah, me too a little.
I can’t believe how fast it’s gone.
But to be honest, Corinna and I also have a couple bottles of wine and beer chilling in the fridge, waiting to celebrate. This is always a bittersweet moment. We’ll definitely miss the energy boost we get from seeing you each week (that’s the best part of this gig), but I’m also excited about getting in a little more sleep, living a slower pace, and just having a chance to be with my family & friends.

The farm doesn’t shut down just because the CSA is over though. I’ve got plenty of things on the to-do list. I thought I’d do a run down and talk you through some of the things we plan to work on this fall and winter.
- Plant garlic. This will take a high priority. I usually do this around Corinna’s birthday (October 30). If you recall, we lost our entire garlic crop this past year. That means we also lost our seed stock. I was able to source some new seed — although not as much as I’d like. We’ll be shucking the seed this week to get it ready for planting. I’m going to make sure I mulch the heck out of this crop — to make sure we don’t have another freeze/thaw disaster like last year. (PS: Good news! We found out this week that we WILL be getting an insurance payment to cover some of our lost income on the garlic crop.)
- Prep beds. What does that mean? I take a tractor and a “bed-shaper” implement and use it to create a first pass of beds for next season. That way, come spring time, I save some time. All I have to do is one quick pass to prep the soil and I can start seeding.
- Spreading mulch on my fields. As a farmer, I’m always feeding the soil. All those veggies that I just grew for you?… they zapped the organic matter and energy from my soil. I need to replenish that energy with cover crops, compost, manure, and “organic” matter. This will break down over the winter and re-energize things for the spring.
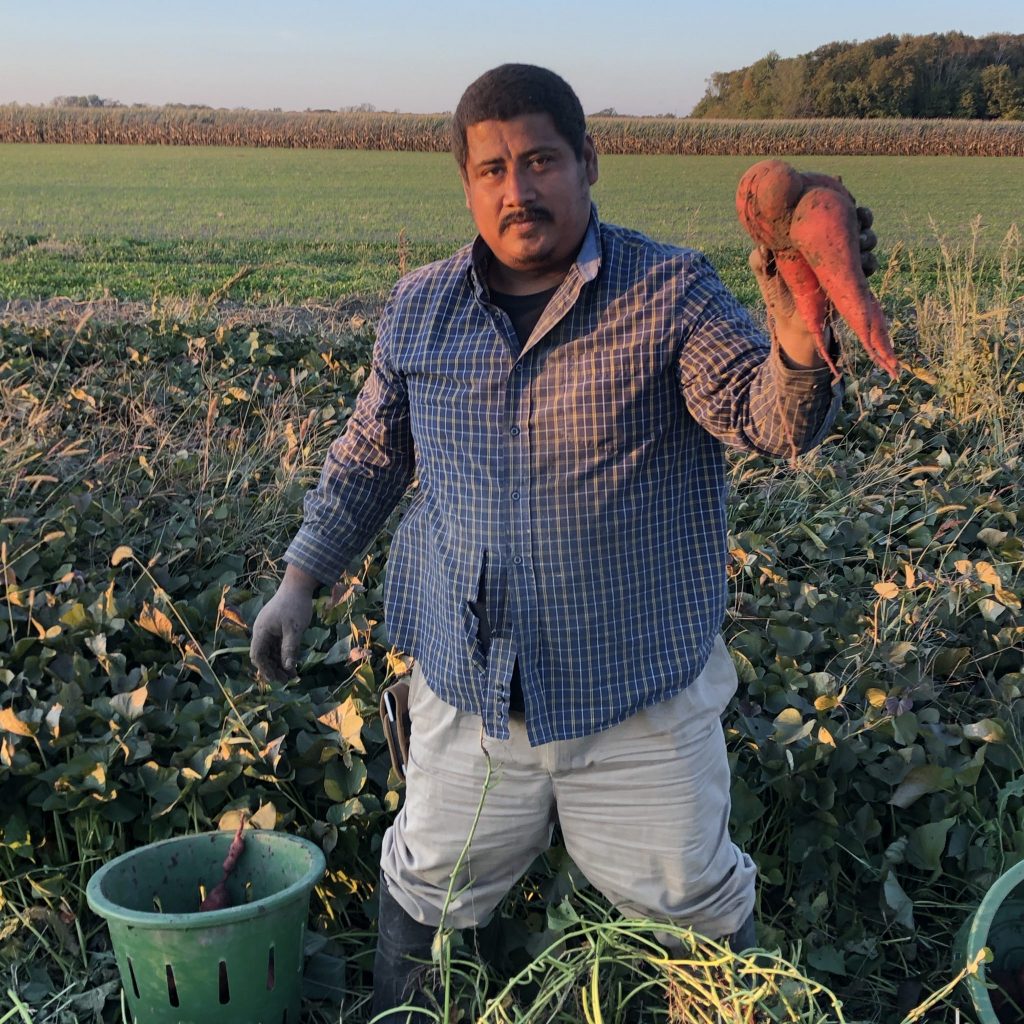
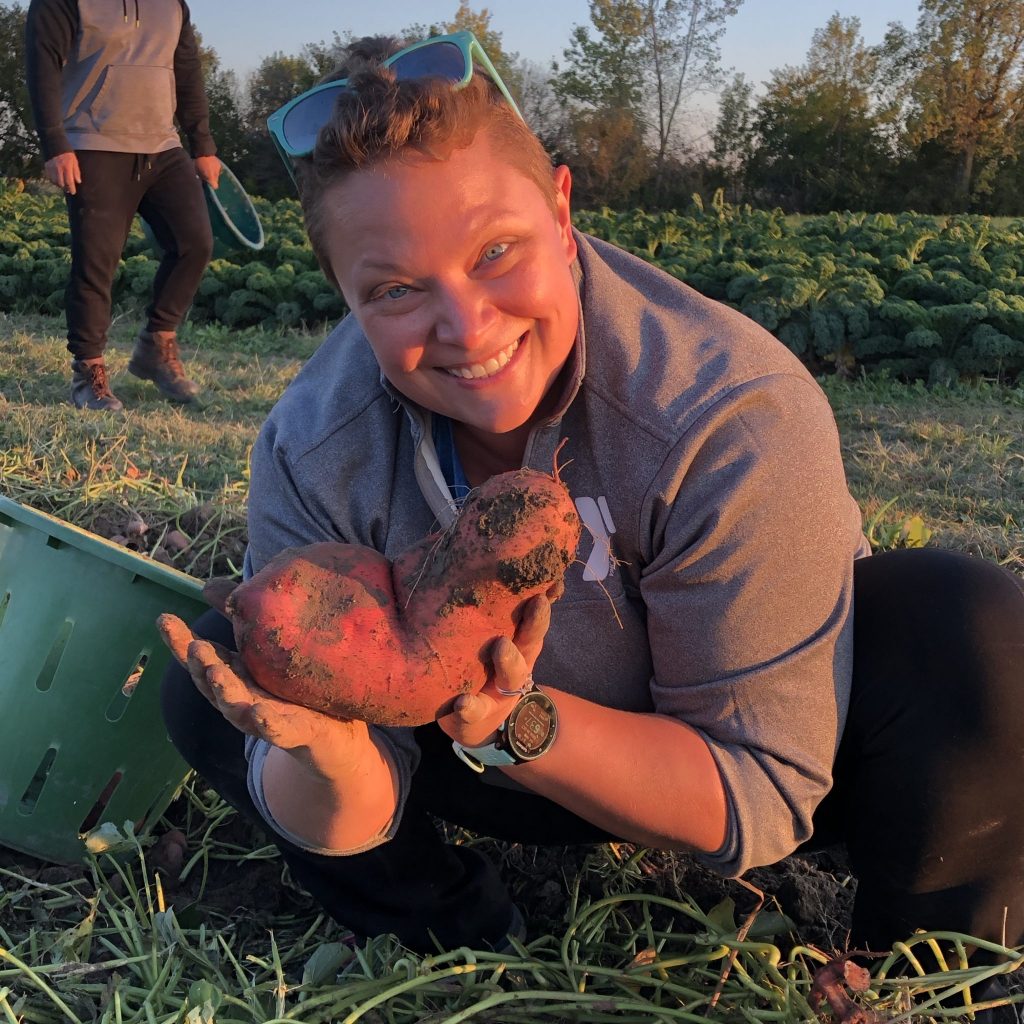
Manuel harvests sweet potatoes. We’ve still got a lot of these out in the field.
- Harvest. There’s still lots out in the field that needs to come in. I’ve got two Booster Shares to fill, so we’ll be watching those crops closely to determine when they are ready for harvest and cold storage: Broccoli, cauliflower, Brussels sprouts, sweet potatoes, winter squash, onions, carrots, turnips, radishes, celery root.
- Take a vacation with my wife. Ah yes… remember my wife? We’ve been talking about a little getaway for the just the two of us for ages. Nothing fancy. We like to find a state park lodge and go hiking, eat good food, and read a good book. We’ll also plan something to do with the boys. They’ve been asking for a summer vacation for a long time. Farmers have to take their family vacation in the winter, and with school in session, that makes things a little tricky.
- Budget for next year. Some of this has already been done. But we will need to take a good hard look at the financials of the business and make some decisions about what we’ll change for next year. We map out our expenses line-item by line-item, and set our income goals for each quarter too. Managing cash flow is the biggest challenge for a farmer.
- Sell some equipment. Winter is the time of year when farmers look for new toys for the farm. It’s the ideal time to unload some equipment that is just taking up space out here. The root crop digger that I bought new a few years ago is one of those items. I recently sold our old CSA trailer too
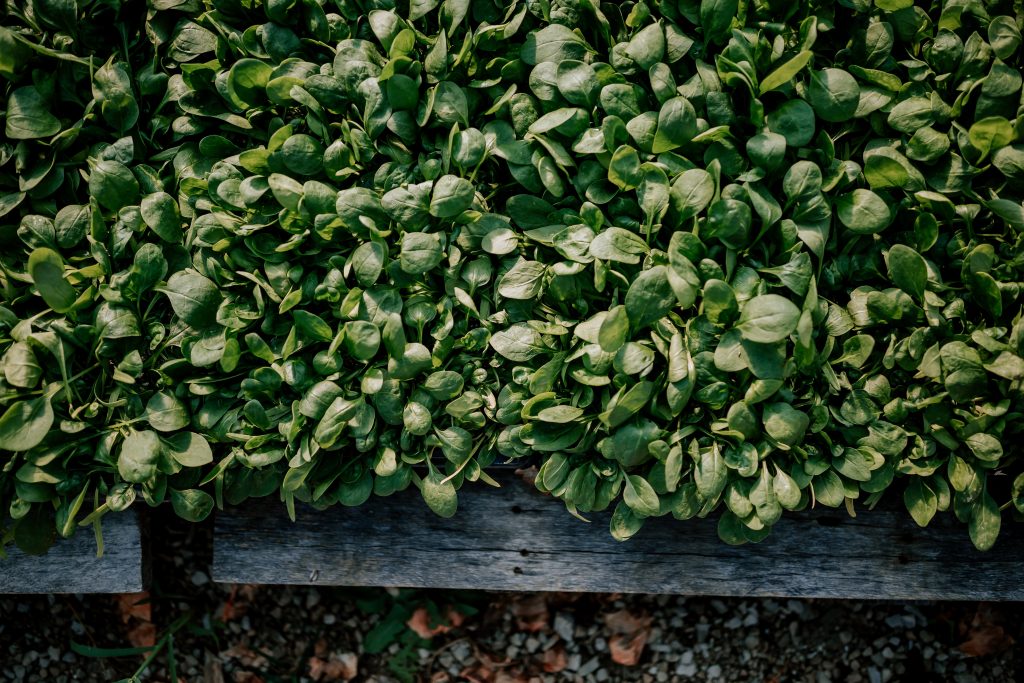
- Plant some spinach in the high tunnel. Unlike some farmers, we really do try to take a “sabbath” break for the winter to rest our body and spirit. But thanks to our high tunnels, we have the ability to keep our hands in the soil just a little bit to serve our chefs and customers. Last year, we got 2-3 cuttings off this spinach, and it was a nice influx of cash.
- Production Planning & Field Maps. I’ll spend many hours mapping out a harvest plan for next season for each week of the year. What will your box look like on any given week? And then reverse-engineering it to determine what seed to buy, exactly when to start planting it in the greenhouse so it’s ready on time, and when to transplant it. I also make a giant field map showing where everything will be planted. With limited acreage, I have to make sure it all fits. This is kind of like playing “Tetris,” and every inch of real estate soil is precious. Sometimes crops get dropped on the editing floor because they simply don’t fit or they don’t make us enough money to be worth the space.
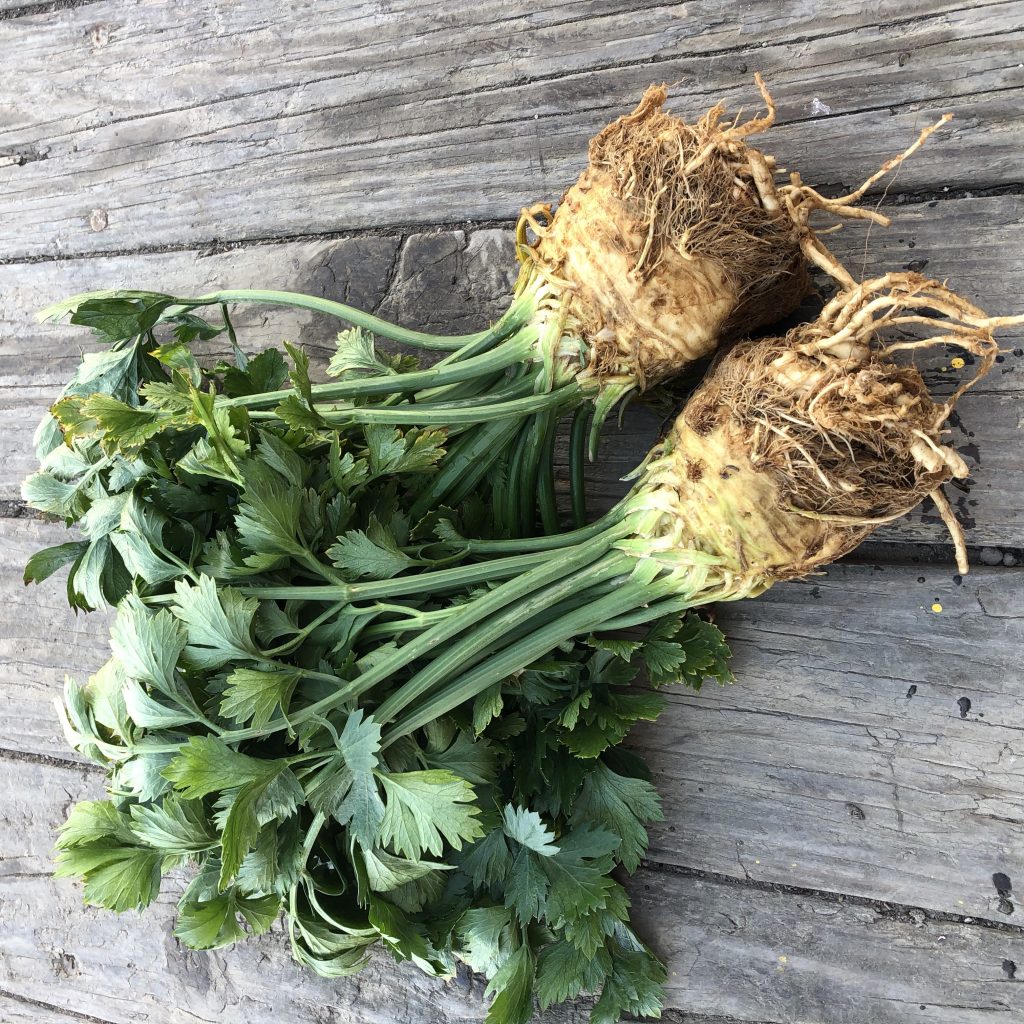
This is celery root, also known as celeriac. It has a strong celery flavor.
- Order seed. Once I decide what to plant, I then have to choose which variety of seed I’m going to use. I love poring over the dozens of seed catalogs that start arriving in my mailbox. Our seed choice decisions largely depend on three things: taste, yield/germination rate, and bug/disease resistance. Greenhouse seeding for onions begins in February, so this order is usually placed before the New Year. And it’s one of the big expenses we have on the front end.
- Evaluate. We spend a good weekend just looking at our end of year surveys, self-evaluating our season, and looking for ways we can make the system even more efficient. We had several areas on the farm that were not firing on all cylinders this year, and so we’ll be doing a big strategy session to figure out solutions.
- Marketing Sales Plan. By October 26, we should have a good idea of our retention rate, thanks to our aggressive early-bird marketing push. With these numbers, Corinna can head into the winter with a good idea of how many spots we still need to sell in our CSA. She’ll come up with some kind of strategy to fill in the gaps.
- Watch Season 8 of Game of Thrones. Yes, we’re going to break down and get an HBO subscription just so we can finally see the end to this series. I’ve heard negative reviews, but we’re so hooked on the Iron Kingdom, we can’t help it.
Yeah, that’s a pretty nice list. Don’t you worry. We stay busy.
If you renewed your membership with us for 2020, a special thank you to you for that show of commitment. And if this is good-bye to CSA, I want to say how much I appreciated the chance to grow for you. As you know, we had a few rough weeks this past season, and in those moments, you still stood by me. I want to say how very grateful I am for that show of support. We say good-bye with a firm handshake, and please know that my farm is always open to serve you again.
We’ll keep in touch — I’m sure Corinna will do a monthly email to our CSA folks to keep you in the loop. And for all of you picking up a Booster Share on November 9 or 24, we’ll let you know details of when and how to pick those up.
Until next time,
Farmer Kurt
WEEK 18 ANNOUNCEMENTS:
- BRING YOUR OWN BAGS TO THE PICK UP SITE THIS COMING WEEK. You will not be allowed to take the final box back home with you for obvious reasons. So we’ll set up an area where you can transfer the box contents into your own bags.
- Manuel, Lucero, Yuriana, and Catalina leave in November. THE “TIP THE STAFF” MONEYPOOL IS STILL ACCEPTING DONATIONS. If you feel led to make a donation to show your appreciation, we’ve set up a PayPal Money Pool here.You have until November 1st to contribute.
- SHORT END OF YEAR SURVEY COMING SOON – PLEASE FILL IT OUT — This is your chance to tell us whatever you want and share feedback that is constructive. We read every one, and we often use this information to make adjustments in our next season.
- Fall Booster Share Pick-Up – If you ordered one of these, they happen on Nov. 9 and 24. We will reach out to you next week with details for how, when, and where to pick up the first one!

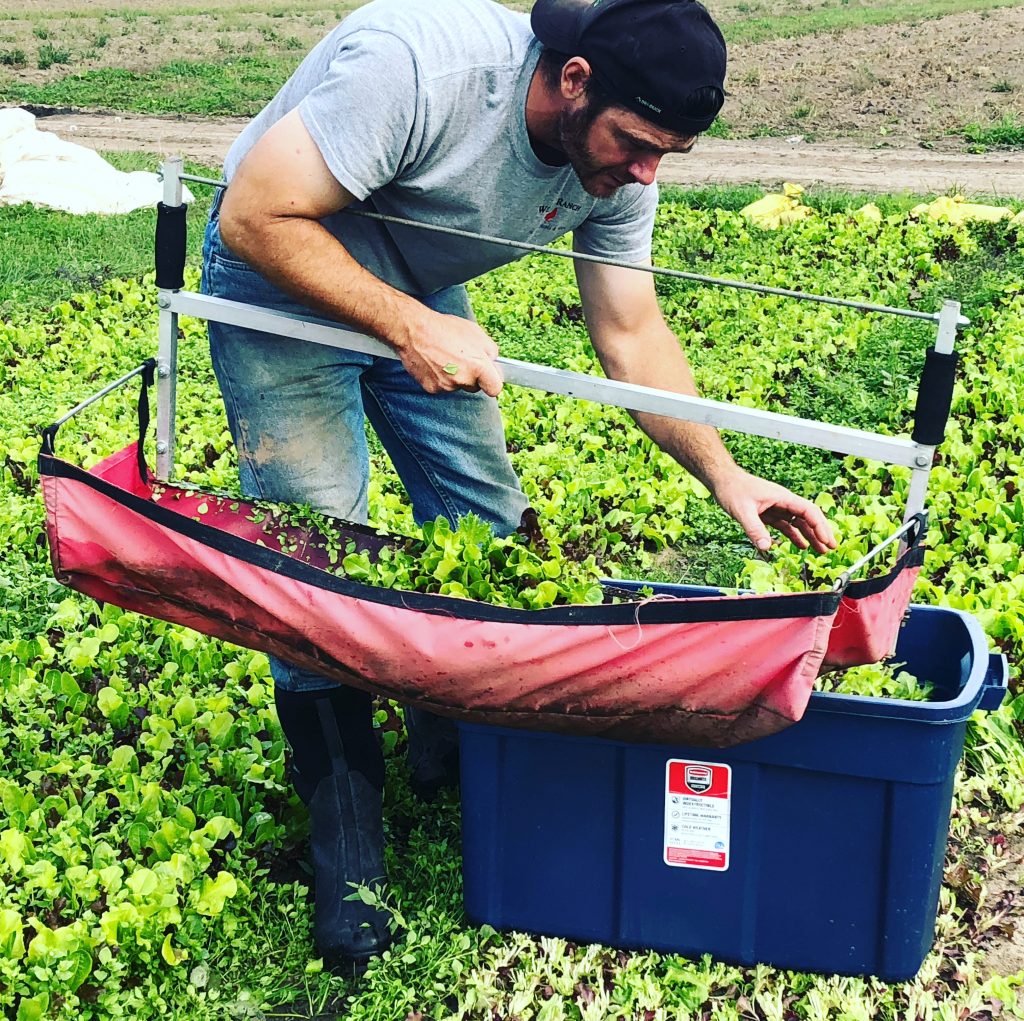
The peppers in the high tunnel have been pulled at last. A sign that we are buttoning up the farm for winter.
RECIPES for WEEK 18
Roasted Butternut Squash with Cider Vinaigrette
Adapted from Country Living (www.countryliving.com)
Total time 40 minutes
Serves 6
Roasting winter squashes really bring out their creamy sweetness, I love trying different toppings on them like this.
Ingredients:
2 small butternut squash (about 1 1/2 pounds each), peeled, seeded, and cut into 1/2-inch-thick slices
1 medium red onion, cut into wedges
3 Tbs EVOO, divided
kosher salt
freshly ground black pepper
1 cup apple cider
1 ½ Tbs whole grain mustard
1 Tbs red wine vinegar
2 Tbs fresh flat leaf parsley, chopped
Directions:
Preheat oven to 425°F. Toss squash and onion with 2 tablespoons oil on two rimmed baking sheets. Season with salt and pepper.
Roast, rotating pans once, until golden brown and tender, 20 to 25 minutes.
Meanwhile, bring cider to a boil in a small saucepan over high heat. Reduce heat to low and gently simmer until liquid has reduced to 3 tablespoons, 12 to 15 minutes.
Whisk together mustard, vinegar, reduced cider, and remaining 1tablespoon oil in a bowl. Season with salt and pepper. Stir in parsley.
Drizzle squash and onion with vinaigrette just before serving.
How to Roast a Squash (halved)
Super simple method to roast any winter squash! Remember once this is cooked you can scoop out the squash and freeze in a freezer bag!
Ingredients:
Olive oil, salt and pepper
1 Butternut squash (or winter squash of your choice)
Directions:
Preheat oven to 375 degrees F.
Using a large, sturdy knife, cut your butternut squash in half lengthwise
Scoop out the seeds and stringy bits from each half and discard (or save for roasting).
Transfer the butternut squash, cut-side up into a baking dish and brush with olive oil or melted butter, coating the entire surface of the squash.
Season with salt and pepper and brown sugar (if desired).
Roast in the oven for approximately 45 minutes, or until soft, and fork-tender.
Remove from oven and allow to cool. Scoop flesh from the skin and enjoy plain or in your favorite recipes.
Savory Stuffed Honeynut Squash
Adapted from Garlic and Zest (www.garlicandzest.com)
Total time 45 minutes
Serves 6
Use honeynut or butternut for this super delicious recipe! It also uses KALE, which I know you might still have!
Ingredients:
For the squash:
3 honey nut squash
1 Tbs EVOO
1 pinch salt
For the Stuffing:
1 cup quinoa farro or a blend, cooked at room temperature
1 medium onion diced
2 cloves garlic minced
8 ounces mushrooms fresh, finely diced
1 tsp thyme fresh
½ tsp sage dried, crumbled
2 cups kale leaves only, tough stems removed, finely chopped
¼ cup vegetable broth
1 Tbs EVOO
½ tsp salt
½ tsp pepper
¼ tsp nutmeg freshly grated
¾ cup Parmigiano Reggiano freshly grated
For topping:
1 tsp butter
1 slice bread I used potato bread, but sourdough or plain white bread work fine to
Directions:
Preheat the oven to 400°. Line a baking sheet with parchment paper.
Cut the squash in half, vertically and scoop out the seeds. Drizzle the cut side with olive oil and rub it into the flesh. Sprinkle with salt and place the squash cut-side-down onto the baking sheet. Roast for 20 minutes.
Meanwhile in a medium skillet, heat the olive oil over medium heat and add the onions and garlic. Saute for 2-3 minutes then stir in the chopped mushrooms, thyme, sage and salt, cook until the mushrooms release their liquid, about 5 minutes. Stir in the chopped kale and vegetable broth, cover and reduce heat to a simmer for 3-4 minutes until kale softens. Stir in the pepper, nutmeg and the cooked grains. Add the parmigiano reggiano and stir until just combined.
Tear the bread into large pieces and transfer to a mini prep food processor. Add the butter and pulse several times until it forms bread crumbs.
When the squash is done, fill the cavities with the stuffing and sprinkle with breadcrumbs and bake for an additional 10 minutes. If the breadcrumbs need additional browning, turn on the broiler and cook just until the breadcrumbs start to brown, (about a minute or two).
Sausage & Apple Honeynut Squash
Adapted from Garden in the Kitchen (www.gardeninthekitchen.com)
Total time 30 minutes
This recipe screams fall! A great Thanksgiving dish if you can save that honeynut!
Ingredients:
3 whole honeynut squash, halved
2 Tbs EVOO
1 pinch sea salt and pepper
4 Andouille sausages
1 whole honeycrips apple, cubed
1 cup celery, chopped
½ cup dried cranberries
1 tsp each oregano, sage, garlic herb
2 sprigs fresh rosemary
Directions:
Pre-heat oven to 400F degrees.
Wash the skin of honeynut squash and towel dry. Cut in half the lengthwise. Remove the seeds and clean the cavity well. Brush the squash with olive oil and season with salt and pepper to taste. Garnish with fresh rosemary. Bake for 30 minutes uncovered.
Meanwhile, heat oil in cast iron. Add sausage, apple, celery and sauté on medium heat for 15 minutes or until apple is soft and sausage start to turn golden brown. Add dried cranberries and season with salt, pepper, oregano, sage and garlic herb.
Remove honeynut squash from oven. Fill the cavity with sausage apple mix. Top wtih fresh rosemary and serve
Potato and Celery Root Mash
Adapted from Epicurious (www.epicurious.com)
Serves 4-6
Combine this new CSA veggie with some potatoes for a super flavorful side dish!
Ingredients:
2 ½ pounds mixed russet, Yukon Gold, and white-skinned potatoes, peeled, cut into 2″ cubes
1 1-pound celery root (celeriac), peeled, cut into 3/4″ cubes
1 6″ piece of horseradish, peeled, coarsely grated
1 ½ cups sour cream
3 Tbs Dijon mustard
2 Tbs (1/4 stick) unsalted butter
Kosher salt
Directions:
Place potatoes, celery root, and horseradish in a large pot. Add water to cover by 1″. Bring to a boil, reduce heat to medium-high, and simmer until vegetables are tender, 25-30 minutes.
Drain, reserving 1 cup cooking liquid. Return vegetables to pot; add sour cream, Dijon mustard, and butter. Using a potato masher, coarsely mash vegetables. Add reserved cooking liquid by tablespoonful’s if mash is too stiff. Season to taste with salt.
Braised Chicken with Celery Root and Garlic
Adapted from Epicurious (www.epicurious.com)
Total time 45 minutes
Serves 4
Super flavorful way to enjoy this root veggie, throw in some carrots or potatoes if you’re nervous about introducing it to your family.
Ingredients:
3 lb chicken parts such as breasts and thighs (with skin and bone) and drumsticks
1 ¼ tsp salt
½ tsp black pepper
1 Tbs EVOO
1 Tbs unsalted butter
1 celery root (sometimes called celeriac; 1 1/4 lb), peeled with a sharp knife and cut into 3/4-inch cubes
1 head garlic, cloves separated and left unpeeled
1 ¼ cups reduced-sodium chicken broth (10 fl oz)
2 fresh thyme sprigs
Accompaniment: crusty bread
Garnish: fresh thyme
Directions:
Pat chicken dry and sprinkle all over with salt and pepper. Heat oil in a 12-inch heavy skillet over moderately high heat until hot but not smoking, then brown chicken, starting skin sides down, turning over once, 8 to 10 minutes. Transfer to a plate and pour off all but 1 tablespoon fat from skillet.
Add butter to skillet and heat over moderately high heat until foam subsides, then sauté celery root and garlic, stirring frequently, until celery root is browned, about 5 minutes.
Add broth and thyme and deglaze skillet by boiling, stirring and scraping up any brown bits, 1 minute. Return chicken, skin sides up, to skillet along with any juices accumulated on plate, then reduce heat and simmer, covered, until chicken is cooked through, 15 to 20 minutes for white meat, about 25 minutes for dark meat. Transfer chicken to a serving bowl as cooked and keep warm, loosely covered with foil.
When all chicken pieces are done cooking, transfer sauce and vegetables to bowl with chicken, discarding thyme.
Celery Root and Sweet Potato Hash
Adapted from Bon Appetit (www.bonappetit.com)
Serves 4
Throw some eggs on top and make this a complete meal!
Ingredients:
1 large celery root (celeriac), peeled, cut into ¾-inch pieces
1 pound sweet potatoes, peeled, cut into ¾-inch pieces
2 sprigs thyme
1 bay leaf
1 cup low-sodium chicken broth
3 Tbs EVOO
¼ tsp cayenne pepper
1 red onion, sliced
1 garlic clove, thinly sliced
Kosher salt, freshly ground pepper
5 slices bacon, cooked, crumbled
Chopped fresh chives (for serving)
Directions:
Cook celery root, sweet potatoes, thyme, bay leaf, chicken broth, oil, and cayenne pepper in a large nonstick skillet over medium-high heat, tossing occasionally, until vegetables are just beginning to soften and liquid is evaporated, 15–20 minutes.
Add onion and garlic; season with salt and black pepper and cook, tossing often and scraping up any browned bits, until vegetables are tender, 30–35 minutes. Remove thyme and bay leaf and toss in bacon. Serve topped with chives
One Pot Sweet Potato and Chard Salad
Adapted from Cooking Light (www.cookinglight.com)
Serves 4
Simple fall salad, you could also use kale if you still have!
Ingredients:
4 cups water
10 ounces diced sweet potato (about one cup)
6 ounces chopped rainbow chard (about one cup)
1 cup hot cooked faro (could also use quinoa or another green)
2 Tbs EVOO
2 Tbs tarragon vinegar
¼ tsp salt
¼ tsp black pepper
2 Tbs sliced scallions
Directions:
Combine water and diced sweet potato in a medium saucepan over medium-high. Bring to a boil; reduce heat to medium-low, and cook 3 minutes. Stir in chopped rainbow chard. Cook until wilted, about 2 minutes; drain well.
Combine chard mixture, hot cooked farro, olive oil, tarragon vinegar, kosher salt, and black pepper in a medium bowl; toss to combine. Sprinkle with sliced scallions.
Garlic Roasted Radishes
Adapted from The Real Food RDs (www.therealfoodrds.com)
Total time ~25 minutes
Serves 4
Roasted radishes are amazing! They become more “potato like” when cooked!
Ingredients:
4 cups radishes, trimmed and halved (~3 cups halved)
4 garlic cloves, minced
2 T butter or ghee, melted (sub coconut oil for vegan-friendly)
½ tsp sea salt
¼ tsp pepper
Optional fresh parsley, dill or chives
Directions:
Preheat oven to 400 degrees. Line baking sheet with foil and set aside.
In a bowl combine all of the ingredients and toss until radishes are evenly coated with the melted butter or ghee.
Place radishes cut side down on baking sheet.
Bake for 14-16 minutes or until slightly golden brown.
Garnish with parsley, dill or chives and serve.
Chard Stir Fry
Adapted from BG Produce (www.bgproduce.wordpress.com)
Total time ~35 minutes
Serves 6
You can definitely substitute some of these veggies! Use whatever you have lingering in that fridge! Use regular garlic since you likely don’t have scapes!
Ingredients:
1 carrot, cut on the bias
1 portobello mushroom, sliced
1 bunch mini broccoli, including leaves, cut into large pieces
1 zucchini, sliced lengthwise and then in 1/2 inch pieces
6 garlic scapes, cut into 1 inch pieces
4 scallion, white ends cut on the bias – reserve and chop greens to top the finished stir fry
Handful of snow peas
1 head Swiss chard, rough chopped
4 leaves from a large Napa cabbage, rough chopped
2-4 T canola or peanut oil
½ cup soy sauce
¼ cup Hoisin sauce
2 tsp sesame oil
2 tsp fish sauce
2 T Sambal Eolek (chili paste)
2 tsp rice wine vinegar
1 heaping tsp grated ginger
1 ½ T corn starch
1 package soba noodles
Directions:
Cook soba noodles according to directions. Drain and set aside.
Prepare all vegetables.
Mix together soy sauce through grated ginger. Taste and adjust to your liking. Stir in cornstarch making sure there are no lumps. Set aside.
Heat a wok or large stockpot over high heat. Add 2 Tablespoons oil and swirl to coat wok/pan.
Add carrot and stir-fry for 1 minute. Add mushrooms and stir-fry for another minute. Add broccoli, zucchini, garlic scapes, and scallions. Stir fry for 1 minute. Add peas, Swiss chard, and Napa cabbage.
Stir-fry until greens wilt. Add oil at any point when pan gets dry.
Add soy sauce mixture and stir fry until thickened slightly, about 2 minutes.
Place soba noodles in a bowl and spoon vegetable stir fry on top. Finish with scallions
Radish and White Bean Salad
Adapted from Bon Appetit (www.bonappetit.com)
Total time ~15 minutes
Serves 6
Don’t let the anchovy’s scare you! You can always leave them out! I love the radish and white bean combo! This is a great salad to make ahead of time, the taste improves with time.
Ingredients:
2 anchovy fillets packed in oil, drained (or make without)
¾ cup extra-virgin olive oil
- 2 Tbs drained capers
- 2 ½ cups (packed) fresh flat-leaf parsley leaves, divided
- ¼ cup (or more) white wine vinegar
- Kosher salt, freshly ground pepper
- 1 bunch radishes, trimmed, cut into thin wedges
- 2 scallions, thinly sliced
- 3 15-ounce cans cannellini (white kidney) beans, rinsed
¾ cup oil-cured black olives, pitted, quartered
Directions:
Blend anchovies, oil, capers, and 1 cup parsley in a blender until a coarse purée forms.
Transfer to a large bowl, mix in 1/4 cup vinegar, and season with salt, pepper, and more vinegar, if desired.
Add radishes, scallions, beans, olives, and remaining 1 1/2 cups parsley to bowl and toss to combine.
Easy Swiss Chard
Adapted from Simply Recipes
Total time ~15-20 minutes
Serves 2-4
The coriander seeds are optional in this recipe, but they are WONDERFUL with chard.
Ingredients:
1 bunch SLF swiss chard
2 Tbs EVOO
1 clove garlic, sliced
Pinch of dried crushed red pepper
¼ tsp of whole coraiander seeds (optional)
Directions:
Prep the chard stalks and leaves: Rinse out the Swiss chard leaves thoroughly. Either tear or cut away the thick stalks from the leaves.
Cut the stalk pieces into 1-inch pieces. Chop the leaves into inch-wide strips. Keep the stalks and leaves separate.
Sauté garlic and crushed red pepper flakes: Heat the olive oil in a sauté pan on medium high heat. Add garlic slices, crushed red pepper, and coriander seeds (if using), and cook for about 30 seconds, or until the garlic is fragrant.
Add Swiss chard stalks: Add the chopped Swiss chard stalks. Lower the heat to low, cover and cook for 3 to 4 minutes.
Add the chopped leaves: Add the chopped chard leaves, toss with the oil and garlic in the pan.
Cover and cook for 3 to 4 more minutes. Turn the leaves and the stalks over in the pan.
If the chard still needs a bit more cooking (remove a piece and taste it), cover and cook a few more minutes.
Serve immediately
Winter Squash and Savory Cabbage Gratin with Garlic
Adapted from Food and Wine (www.foodandwine.com)
Total time 60 minutes
Serves 6-8
Ingredients:
10 garlic cloves
¾ cup EVOO, plus more for greasing
¼ cup hazelnuts
One 2-pound butternut squash—peeled, halved lengthwise, seeded and cut into 1/2-inch-thick slices
One 1-pound Delicata squash—halved lengthwise, seeded and cut into 1/2-inch-thick slices
Kosher salt
Pepper
1 pound Savoy cabbage, cored and cut into 2-inch pieces (about 16 cups)
2 cups low-fat milk
2 Tbs cornstarch whisked with 1/4 cup water
4 ounces mild white cheddar or Fontina, shredded
3 Tbs chopped parsley
1 ½ Tbs chopped fresh sage
Directions:
Preheat the oven to 375°. In a small saucepan or skillet, cook the garlic with 1/2 cup of the olive oil over moderately low heat until the garlic is softened, about 15 minutes. Transfer the garlic to a small bowl and mash to a paste. Reserve the oil for another use.
Spread the hazelnuts in a pie plate and toast for about 12 minutes, until fragrant. Transfer to a clean kitchen towel and let cool slightly, then rub together to remove the skins. Coarsely chop the hazelnuts.
On a large rimmed baking sheet, toss the squash with 2 tablespoons of olive oil; season with salt and pepper. Arrange in a single layer and bake for about 30 minutes, until softened and golden. Leave the oven on.
Meanwhile, lightly grease eight 8-ounce ramekins or gratin dishes with olive oil and arrange on a large rimmed baking sheet. In a large saucepan, heat the remaining 2 tablespoons of olive oil. Add the cabbage, season with salt and cook over moderate heat, stirring occasionally, until wilted, 10 to 12 minutes.
Transfer the cabbage to the prepared ramekins and top with the roasted squash. In a medium saucepan, heat the milk with the mashed garlic over moderate heat until it just comes to a boil. Add the cornstarch slurry, whisking until thickened, about 1 minute. Whisk in the cheese and herbs and season with salt and pepper. Pour the sauce evenly into the ramekins. Bake in the center of the oven for about 30 minutes, until bubbling.
Turn the broiler to high. Transfer the baking sheet with the ramekins to the top rack of the oven and broil 6 inches from the heat source for about 2 minutes, until the squash is browned in spots. Sprinkle with the chopped hazelnuts and serve.
Asian Beef, Broccoli and Cabbage Stir Fry
Adapted from Julia’s Album (www.juliasalbum.com)
Serves 4
Super easy way to use a lot of veggies up! Throw in some greens if needed or some carrots!
Ingredients:
1 Tbs EVOO
½ pound ground beef
½ head cabbage, finely chopped
4 garlic cloves, minced
1 cup broccoli, cooked, finely chopped
¼ cup tamari sauce (use less if using regular soy sauce)
½ tsp ginger
1 Tbs sesame oil
¾ cup water
1 Tbs cornstarch
Directions:
Prep the Heat olive oil in a large skillet on medium heat. Add ground beef and cook until cooked through. Drain any fat or liquid.
To the same skillet, add chopped cabbage and garlic. Cook until cabbage is tender and reduces in volume. Stir in cooked (or blanched) broccoli.
Add tamari sauce, ginger, and sesame oil and stir to combine – on medium heat.
In a small bowl, combine 3/4 cup water with 1 tablespoon cornstarch – and mix it in the bowl until smooth.
Add the corn starch water to the skillet, mix with cabbage and cook on medium heat until heated through and sauce somewhat thickens, constantly stirring.
Season with salt if necessary